www.oracle.com/technetwork/java/javase/downloads/jre8-downloads-2133155.html
Insert the IzoT Net Server CD included with the Wi-Fi EVK into your CD or DVD drive.
If the installation does not start automatically, browse the CD and double-click the IzoTNetServer402.exe installation program. Any previously installed version of an LNS or OpenLNS Server will be automatically uninstalled.
Follow the instructions provided by the installation wizard. When you see the Customer Information window, enter the IzoT Commissioning Tool Activation Key printed on the back of the Commissioning Tool DVD. Under Echelon Account, enter the user name (e-mail address) and password for your Echelon download account if you have one. Entering your Echelon download account will enable you to download software from the Echelon Web site; make activating and managing licenses for multiple Echelon products easier; enable you to return, transfer, and recover licenses;and help you receive technical support from Echelon faster. If you do not have an Echelon download account, you can create one here, or you can leave Echelon Account blank.
Click Next.
Click Install, and complete the instruction steps.
Install the IzoT Commissioning Tool. Installing the IzoT Net
Server on the same computer with the OpenLNS Commissioning Tool converts
the OpenLNS Commissioning Tool to an IzoT Commissioning Tool. The
product names referenced by the OpenLNS Server and the OpenLNS Commissioning
Tool are not all updated to the new IzoT names by the IzoT Net Server.
You will see references to both sets of names in the software
and documentation.
If you have not previously installed and activated the OpenLNS Commissioning Tool, insert the OpenLNS Commissioning Tool EVK Edition DVD included with the Wi-Fi EVK and install that now, entering the same IzoT Commissioning Tool Activation Key that you used for the IzoT Net Server installation.
If you previously installed the OpenLNS Commissioning Tool Professional Edition,you can continue to use it and skip to the next step. If you previously installed and activated the OpenLNS Commissioning Tool Standard Edition, use the Echelon License Wizard to return the OpenLNS Commissioning Tool Standard Edition license to your account and re-activate using the IzoT Commissioning Tool Activation Key used above. This will remove the network limit set by the Standard Edition Activation Key.
Create a LonTalk/IP interface.
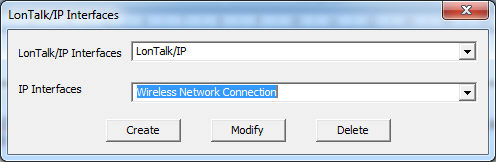
Click the Windows Start button, open the Echelon IzoT Network Service Utilities folder, and then click LonTalk-IP Interfaces. The following dialog appears:
Type a name such as LonTalk/IP in the LonTalk/IP Interfaces box. This will be the name you supply when specifying an interface to IzoT CT or NodeUtil.
Select your LAN connection from the list of available IP interfaces.
Click Create.
Close the LonTalk/IP Interfaces application.
Install a terminal emulator. A terminal emulator is optional,
but is very useful for debugging the Wi-Fi EVB. If you do not already
have a terminal emulator installed on your computer, then you can
obtain one for free such as PuTTY. You can download PuTTY from
www.chiark.greenend.org.uk/~sgtatham/putty/download.html.
Your chosen terminal emulator program must support serial communication
using a standard (virtual) COM port at 115200 baud (8N1, no handshake).
Install the WireShark network protocol analyzer. Wireshark is
optional, but is very useful for network traffic analysis.
If you do not already have WireShark installed, download a free from www.wireshark.org/download.html and install it.
Close the Wireshark tool if it is running.
Copy lontalkip.dll from C:\Program Files (x86)\LonWorks\WireShark\LonTalkIp Plugin to your Wireshark plugins directory while Wireshark is not running. In a typical installation, this will be C:\Program Files\Wireshark\plugins\1.12.1, where 1.12.1 is your version of WireShark. The distribution includes the plug-in compiled for both 32-bit and 64-bit versions of Windows. Use the one appropriate to your Windows installation.
Install the IzoT CPM 4200 Wi-Fi SDK. Download the IzoT CPM SDK
from www.echelon.com/products/izot-cpm-4200-wifi-evk
and run the IzoTCPMSDK.exe
installation program. Follow the instructions provided by the
installation wizard.
Install the FTDI D2XX Driver Update.
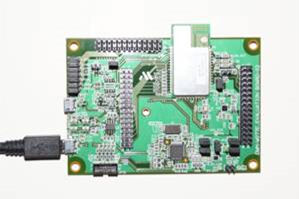
Disconnect one of the Wi-Fi EVBs from your computer, leaving one connected to your computer via the supplied USB A to USB Micro B cable connected to the lower port of the Wi-Fi EVB as shown.
Open Windows Update, click Check for Updates and wait for this to complete.
Click Optional Updates, and look for an update called FTDI – Other hardware – USB Serial Converter B update as shown below. Select only the FTDI – Other hardware – USB Serial Converter B and then click OK.
Click Important Updates (if shown) and clear all the updates so that only the FTDI update will be installed. Click OK.
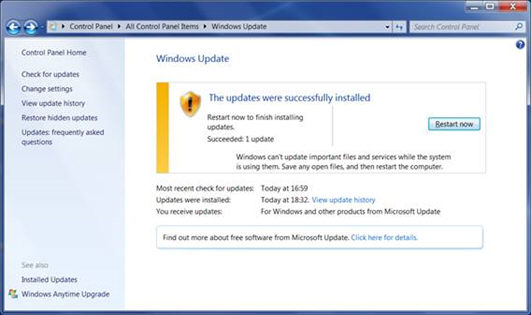
Click Install Updates, once complete, close any other open applications that may be running after saving your data. Click Restart Now when prompted as shown below. If no updates were available, then proceed to step 7f below.
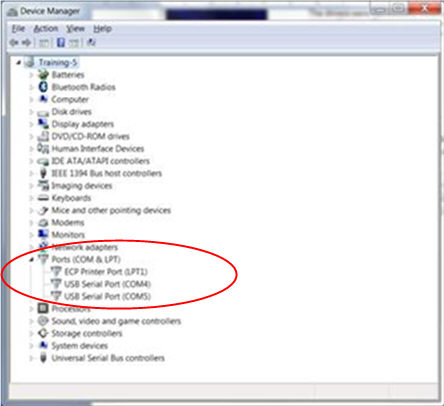
Open the Device Manager from your Control Panel, it should show two USB ports as follows (but not necessarily with the same COM port numbers as shown).
Right click one of the USB ports, select Properties, click the Driver tab and verfiy that the Driver Version is 2.10.0 or greater. Click OK.
If the driver is not 2.10.0 or greater, download CDM v2.12.00 WHQL Certified.zip (or the latest version) from www.ftdichip.com/Drivers/D2XX.htm , uncompress it to a suitable location and run the relevant installer for your computer. The installer filename is dpinst-x86.exe for 32-bit Windows installations or dpinst-amd64.exe for 64-bit Windows installations (this may take some time to complete).

Install the LIBUSB Driver.
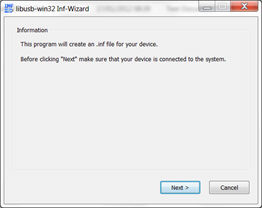
Open the C:\Program Files (x86)\LonWorks\cpmsdk\cpm4200\libusb\libusb-win32-bin-1.2.6.0\bin folder in Windows Explorer and run inf-wizard.exe. The following dialog appears:
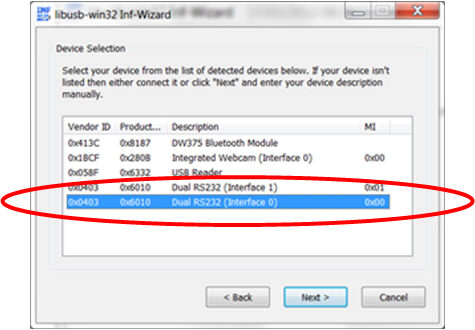
Click Next. The following dialog appears:
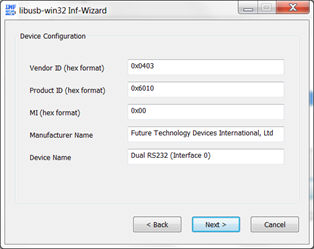
Select the Dual RS232 (Interface 0) interface. Click Next and the following dialog appears:
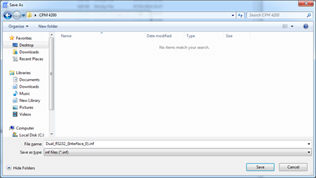
Click Next and the following dialog appears prompting you to save the Dual_RS232_(Interface_0).inf file:
Choose a suitable location and click Save. You will not need to reference the saved file again. The following dialog appears:
Click Install Now and the following dialog appears:
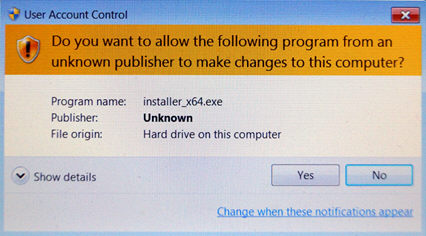
Click Yes and the following dialog appears:
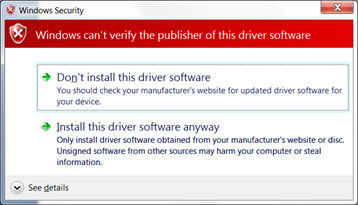
Click Install this Driver Software Anyway. The following dialog appears:
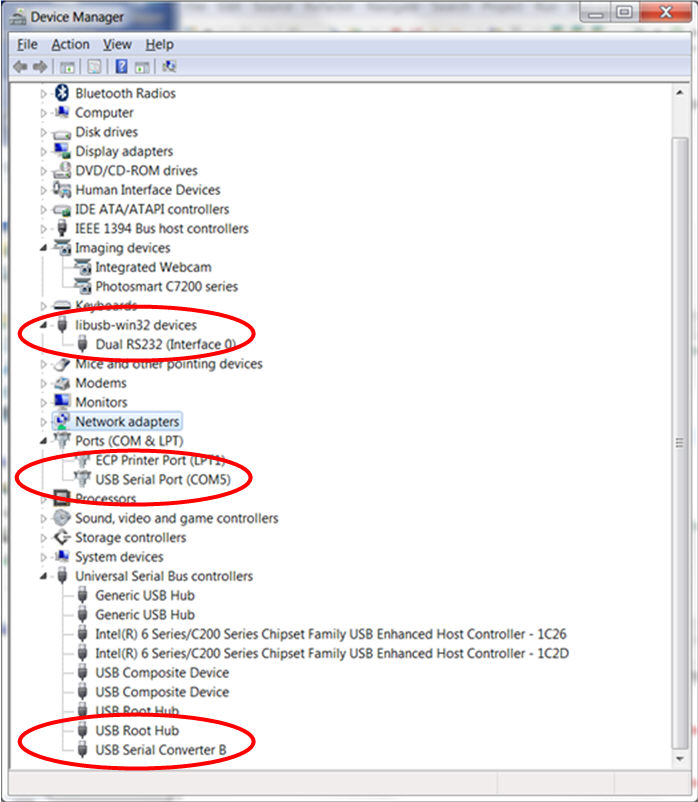
Click OK. Device Manager should now show a Dual RS232 (Interface 0), a USB Serial Port, and a USB Serial Converter as shown below. Make a note of the USB Serial Port--in the following example it is COM5.
If the FTDI D2XX driver is updated either by Windows Update or manually, you will have to reinstall the LIBUSB driver as described above.

Set up a terminal emulator session.
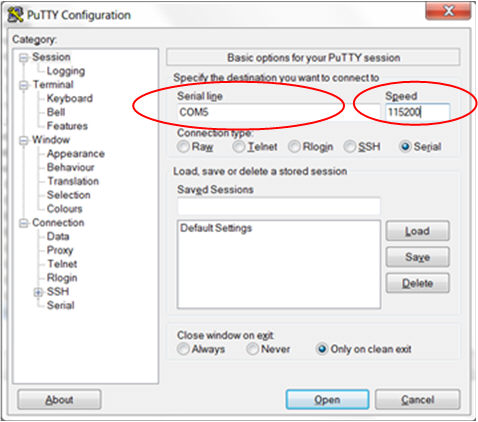
With the Wi-Fi EVB still connected, Start PuTTY or a similar terminal emulator package.
Select a 115200 bps serial port. For PuTTY, select Serial, specify the Serial Line as noted previously, and set the speed to 115200 bps (8N1, no handshake).
You should see a blank console window; any form of running application will have serial communications. You will return to the terminal emulator later.
![]()
Start the IzoT CPM 4200 Programming Tools.
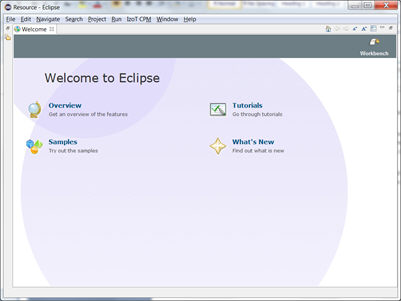
Start the Echelon IzoT CPM Programming Tools from within the Echelon IzoT CPM SDK program folder. The following window appears:
Close the Welcome tab.
If the programming tools fail to launch with errors relating to the Java runtime environment, such as the following:
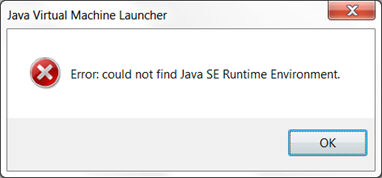
Ensure that you have the correct JRE installed and configured
as described above. You can find more information on Eclipse JRE
requirements here. Once the JRE configuration is addressed, start
Echelon IzoT CPM Programming Tools again, closing the Welcome
window once launched.
Set up OpenOCD as an external tool in Eclipse. You only have
to do this once as the configuration will be available to all your
projects. The CPM SDK uses the open-source Open On-chip Debugger
(OpenOCD) to provide a debug interface, connecting the Wi-Fi EVK or
custom hardware via USB to the C or C++ source code debugger in Eclipse.
To use OpenOCD, users of the IzoT CPM 4200 Wi-Fi EVK Beta release
must configure OpenOCD as an Eclipse external tool.
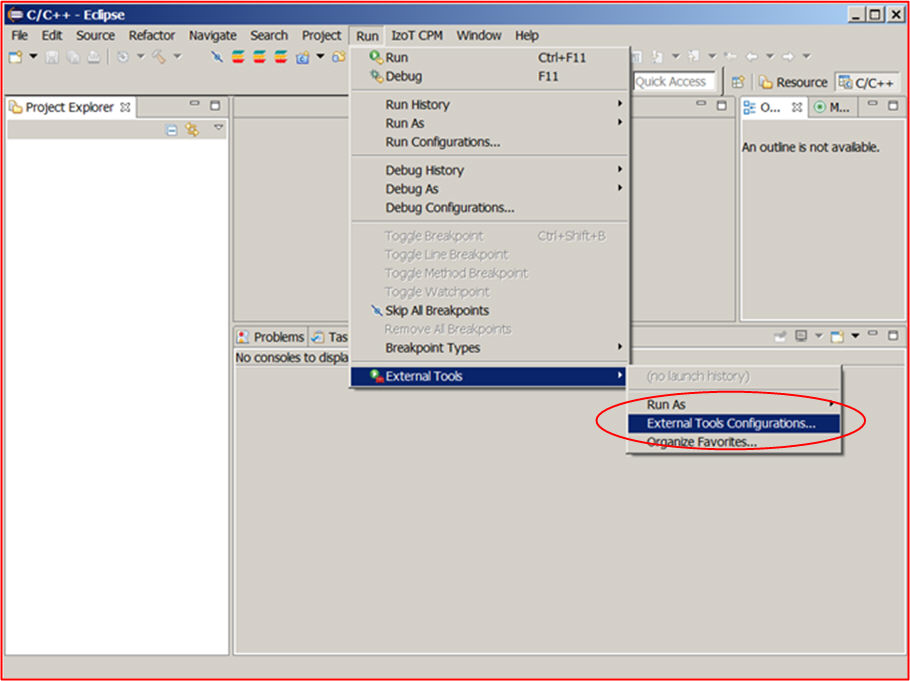
From the Eclipse main menu, select Run -> External Tools -> External Tools Configuration. The following dialog appears:
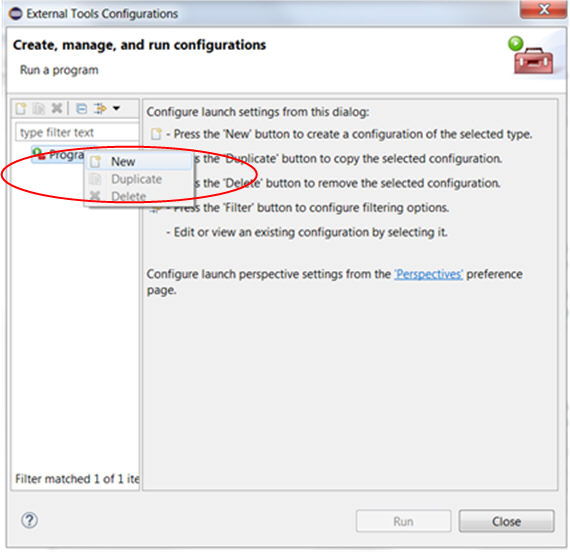
Right click Program and the select New from the shortcut menu. The following dialog appears:
The following dialog appears:
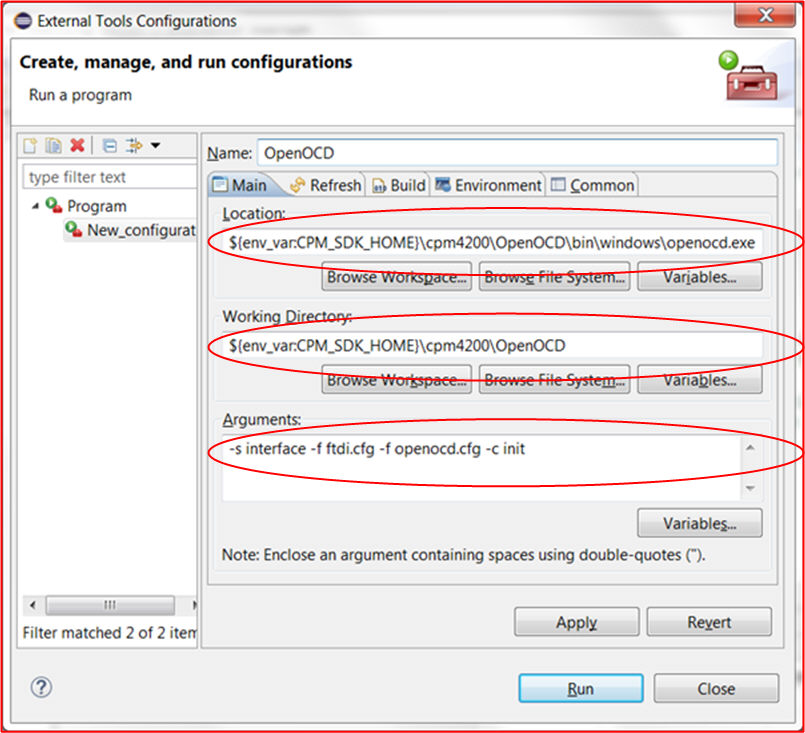
Enter the name of the configuration in the Name box, for example, OpenOCD.
Enter the following value in Location :
${env_var:CPM_SDK_HOME}\cpm4200\OpenOCD\bin\windows\openocd.exe
Enter the following value in Working Directory:
${env_var:CPM_SDK_HOME}\cpm4200\OpenOCD
Enter the following value in Arguments:
-s interface -f ftdi.cfg -f openocd.cfg -c init
Click Apply to save the configuration.
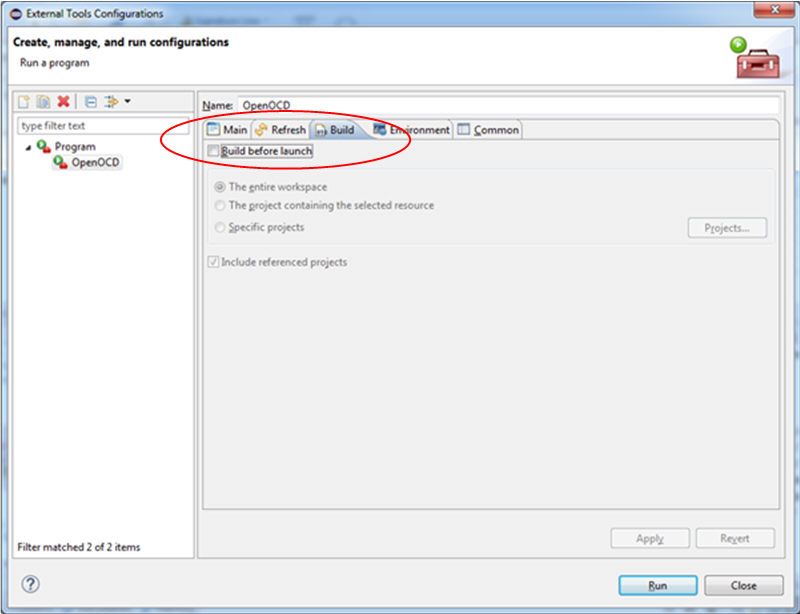
Select the Build tab.
Ensure that that Build Before Launch is not selected. Click Apply to save the changes.
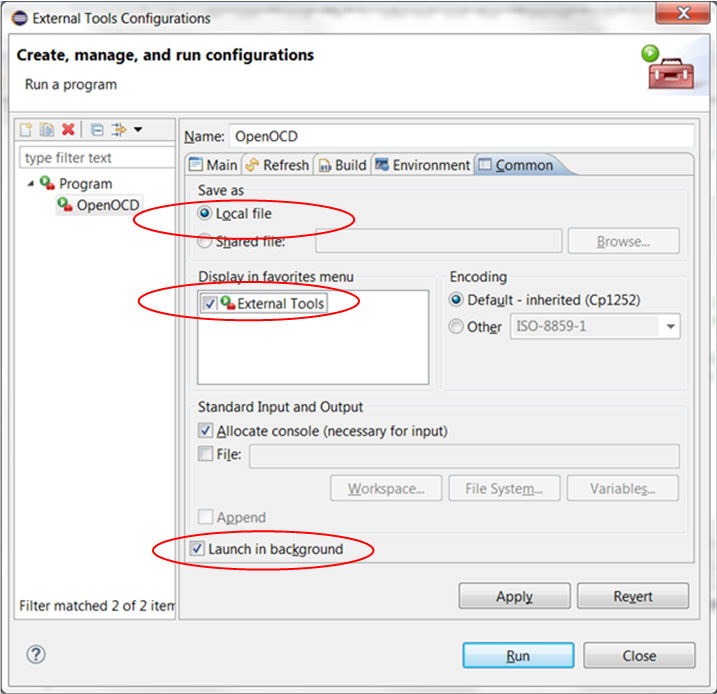
Select the Common tab.
Ensure that Local File is selected and that External Tools is selected in Display in Favorites. Ensure that Launch in Background is selected. Click Apply to save the configuration.
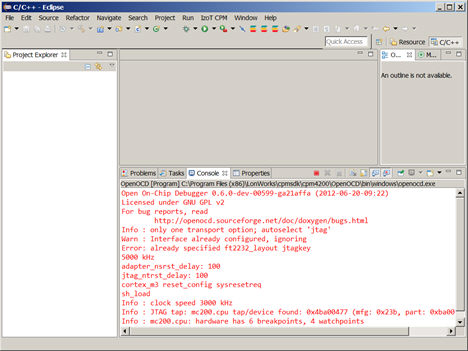
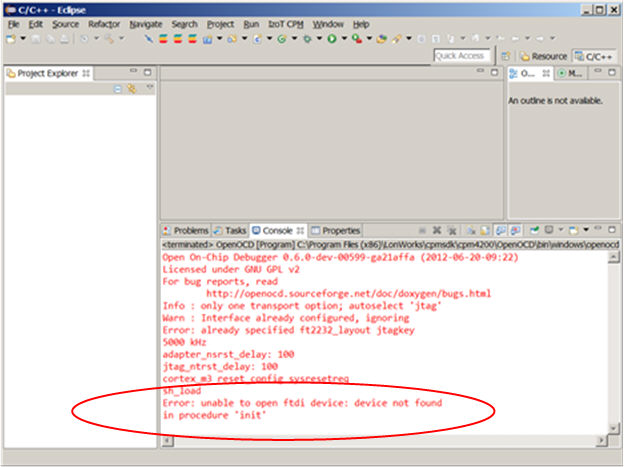
With the Wi-Fi EVB still connected, click Run to start the OpenOCD connection and you should see the following (the OpenOCD version may be different), confirming the connection was established correctly (you can ignore the Interface Already Configured warning and the Already Specified FT232_layout jtagkey error):
However, should you see an Unable to Open FTDI Device: Device Not Found error, you have a configuration issue. Ensure the Wi-Fi EVB is connected to your computer and re-run the LIBUSB Driver Installation procedure. Click Run and select External Tools -> External Tools Configuration click Run to try the OpenOCD connection again. When you subsequently start the IzoT CPM Programming Tools, connect your Wi-Fi EVB and you can now start the OpenOCD connection from the external tools configuration you have just established.
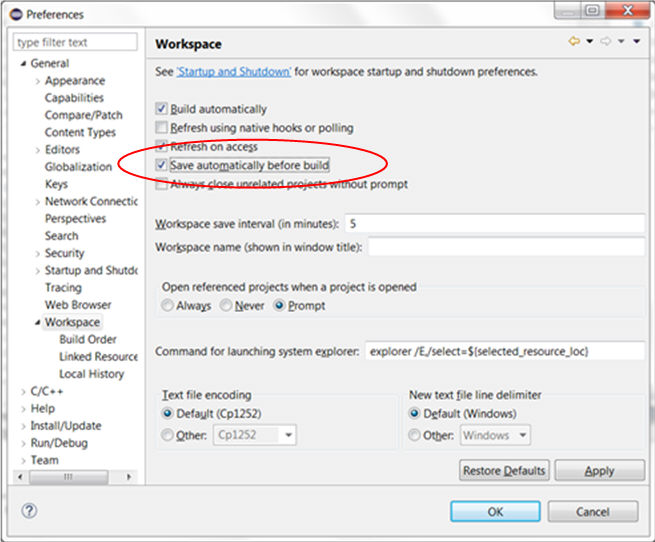
Configure Eclipse to save modified files automatically before
building. In Window ->
Preferences -> General
-> Workspace, ensure that
Save Automatically before Build
is selected. Click OK
to save the changes.
Set up a Wi-Fi module project.
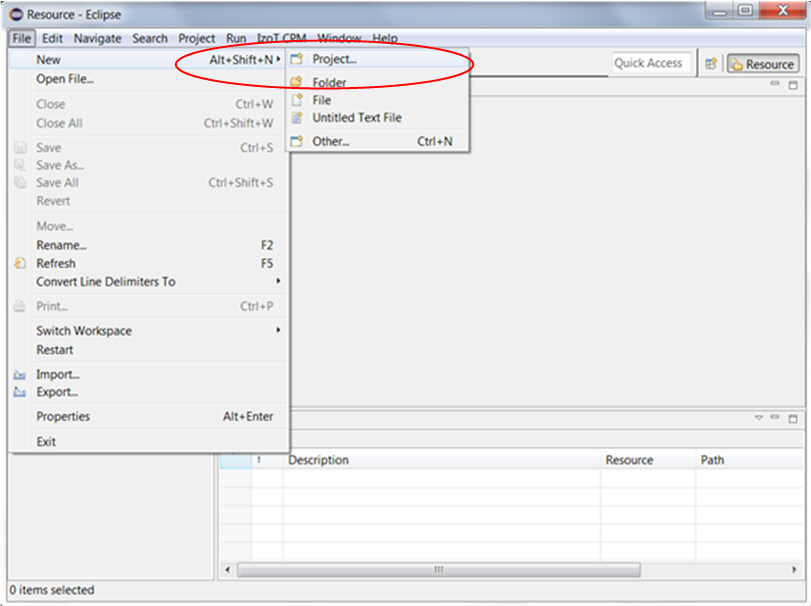
From the Eclipse main menu, select File -> New Project:
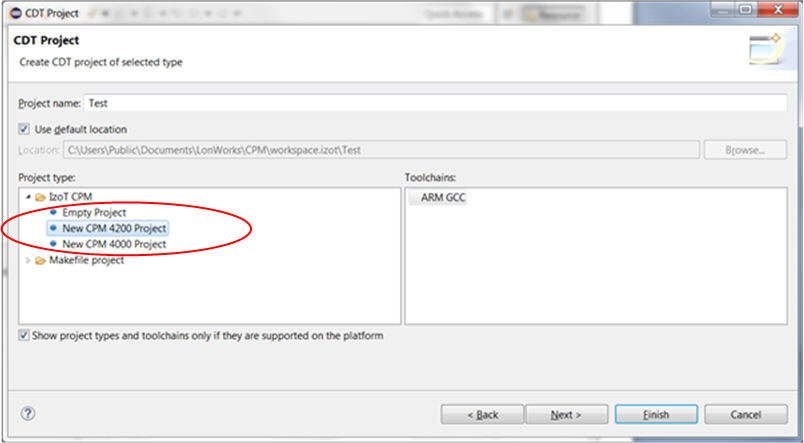
Expand C/C++ and select IzoT C/C++ CPM Project.
Click Next. The following dialog appears:
Enter a project name (project names cannot have spaces), select New CPM 4200 Project, and then click Next. The following dialog appears:
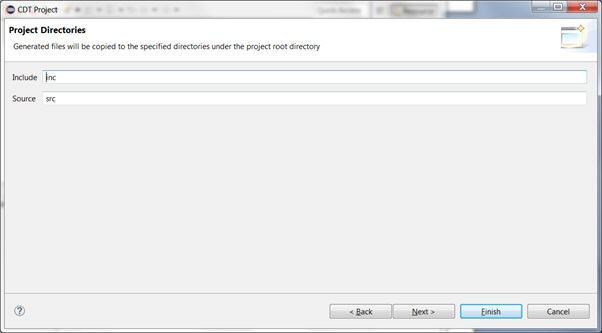
Click Next. The following dialog appears:
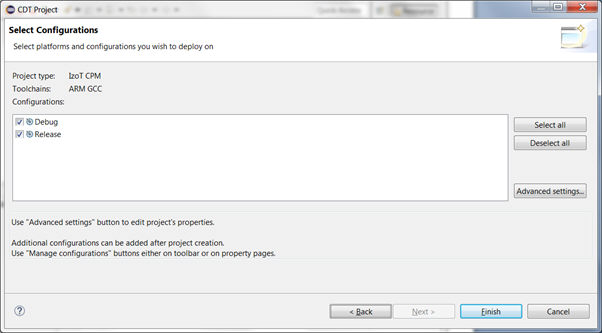
Click Finish. The following dialog appears:
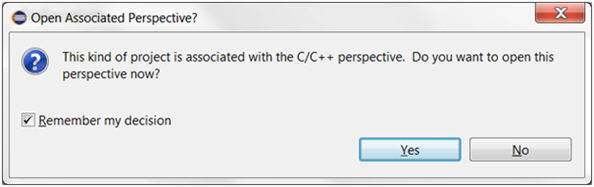
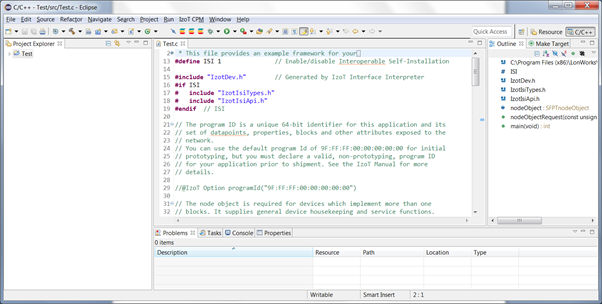
Select Remember my Decision, and then click Yes. You will now have a new project set up with the following skeleton code:
In subsequent references to File
-> New, you will see
the following:
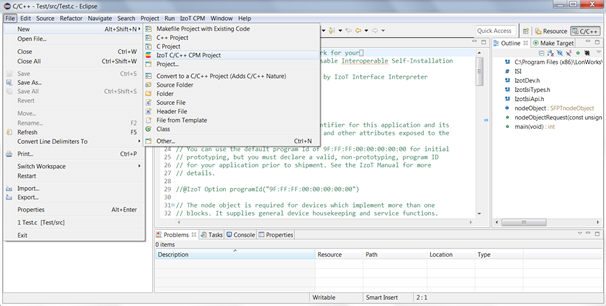
You should now see the following dialog:

Build the Wi-Fi module project: right click your project in
the Eclipse Project Explorer and select Build
Project.
Explore the default project created by the New IzoT C/C++ Project
wizard. The default project includes the following:
- The main C source file, sharing the name with the project name.
This file includes the standard C main() function and entry point.
Do not rename this file. This file does not need to contain
your application's main() entry point, but it does contain your
application's IzoT interface definitions. For a new project, this
file contains a simple application skeleton including a simple
example Node Object block implementation and a skeleton main()
function for your application.
- A pair of IzoTDev.h
and IzoTDev.c files, initially
empty. When you build the application, the CPM SDK build tools
inspect your main C source file for IzoT Markup Language definitions,
and generates all declarations and code required in these two
files. You can inspect these files, but don't edit them because
the tool overwrites them when you build your application.
- A pre-configured set of include files and link libraries to
provide access to the IzoT Device Stack DX and the runtime system.